Showing posts with label gluten-free. Show all posts

Tuesday, December 9, 2014

Roasted Cauliflower with Pomegranate Molasses & Lemon Tahini Dressing


I'm kind of in love with the Middle East in oh so many ways, while the cuisine may be nowhere near as stimulating as the political movements going on at any given moment, that is sort of like saying something is shorter than a giraffe.

I whipped this dish together with a few friends and fell in love with it so hard I immediately ran to the store first thing the next day to get more cauliflower and make it again because ZOMG I NEEDED TO SHARE THIS WITH THE (INTER)WORLD ASAP!

The original recipe I used had you frying the cauliflower, which added all sorts of work, time, dishes, and fat, and while I'm kind of into all of those things my freak festishes aren't necc. your freak fetishes so I opted to roast the cauliflower instead.

It is kind of an amazing dish right now for those of us trapped in New England, but vegetal and seasonally appropriate. Stores great for lunches and munches the next day.

Roasted Cauliflower with Pomegranate Molasses & Lemon Tahini Dressing

  • 1 batch of Tahini Sauce 4 Everything
  • 4~ lbs head(s of) Cauliflower
  • Pomegranate molasses
  • Canola (or other high heat neutral oil) for roasting
  • Salt & pepper for seasoning
  • Optional fresh chopped green herbs for garnish (Parsley, cilantro, chives, etc.) 
Preheat oven to 500.

Chop the cauliflower into florets about the size of your thumb, and toss with enough oil to lightly coat. Place on 2 sheet pans covered in parchment paper, sprinkle with salt and fresh ground pepper, and place in oven for about 15 minutes, rotating until they're evenly goldened.

Arrange the cauliflower in a serving dish and lightly drizzle with pomegranate molasses and tahini sauce.  Garnish with chopped herbs if available.

Six years ago this December I posted a recipe for a pretty good Creamy Eggplant Roasted Red Pepper soup.

Monday, December 8, 2014

Thick Tahini Sauce #SAUS4EVRYTNG!

From the right! 

Open Sesame!

Sesames are magic. Tahini is awesome. Therefore tahini sauce=magical awesome sauce that makes your mouth open to access all of the flavorful treasures in front of your FACE! 

Seriously. This stuff is a super treasure for omnivores, vegans, aliens not-otherwise-allergic to sesame (even if they are, it is worth it). It is so super that at la boqueria market in Barcelona, a woman at a falafel shop screamed at me when I touched the bottle on the counter top (my friend got a falafel there, I did not). 

This stuff is good.  Just trust me on this. You can put it on anything: sandwiches, nachos, salads, pizzas, your finger (like really, I just keep squeezing it onto my finger and eating it off. Even when not trying to seduce someone).

It comes together quickly. The only down side is it doesn't last too too long before getting a bit of an off taste (but it is still pretty good then, too), but that shouldn't be a problem. You can also freeze half or so of it for when you're ready. 

blah blah blah RECIPE! 

Thick Tahini Sauce

Now from the left! 

  • 1.5 c Tahini 
  • 3-4 cloves garlic (more if daring)
  • 1 c fresh squeezed lemon juice (5 lemons +/-)
  • 1 t salt
  • 1/2 c water
Toss all of ingredients, except the water, together in a blender or food processor on low until well blended.  Slowly start to add the water until you reach the consistency desired.  You can add a little more if you want for better bottle'ability. Lasts for about 2 weeks.

Variations

  • Spicy! Toss in 2-4 T of your fave hot sauce product (chipotle chiles in adobe sauce! Sriarcha!  Harissa!) 
  • Spicy n' Tangy! Same as above, but also add 1/4 c of pomegranate molasses (available at any middle eastern market or hippie ass coop). 
  • Roasted Garlic! Toss in 6-8 roasted garlic cloves and blend well.
  • Roasted Red Pepper: Blend in 1/4 c roasted red peppers.
2 years ago this December I posted about Peanut Butter Chocolate Crunch Ninja Star cookies.

Tuesday, April 9, 2013

My 5 Minute Morning Green Smoothie


As I've mused before, since getting back from South East Asia I've been slowly dragging my carcass into the realm of the living with being good about light yoga, upping my workload slowly, amongst other things.  Of course, none of that will do me much good if I'm not sweeping the steps of my body's temple with high fiber green vegetables! 

I have generally had a bit of a hard time with smoothies, finding there is either too much added sugar in the form of flavored non-dairy milks, agave, bananas, dates, etc. lacking in actual vegetable content aside from a cursory couple of de-stemmed kale leaves or dash of spirulina.  

The flipside is me going overboard and forgoing flavor in the name of "healthy," and end up chewing through a thick, fibrous, muddy beet, kale, cinnamon, acai, maca, almond, jalapeno, parsley, grapefruit sludgefest that tastes about as good as the dirt they're all grown in. 

Finally I seem to have found a tasty medium that tastes pretty damn good (For something so healthy), isn't packed full of freaky banana sugar (one banana has approximately 15 grams of sugar in it, thats a tablespoon!), is predominantly vegetable based.

Oh, also, it takes like less than 5 minutes to prepare (though a bit longer to thoughtfully sip as you review your various morning rages), as there is barely any prep involved beyond DUMPING STUFF IN TEH BLENDER!

So, what all goes into this?  Well, lets get onto the recipe below for that.


5 Minute (AMAZING) Green Smoothie
Makes 2-4 servings to fuel you, and maybe company, throughout the day.

  • 1 large, organic cucumber, ends trimmed*, and cut into 3-5 chunks
  • 1/2 a small bunch organic parsley or cilantro, stems included
  • 1 mottled banana (the browner the skin, the less starchy), peeled and halved
  • 2 organic kiwis, ends removed, and halved, skin on**
  • 3-5 leaves organic kale, torn in half lengthwise
  • 1 head organic romaine lettuce, bottom cut off and then cut into 3 or 4 sections
  • 1 Organic apple, quartered (I use fuji, but any should work)
  • 1 inch knob of ginger
  • *optional* juice of 1 fresh lemon or fresh lime
  • *optional* A dash of spirulina
Place about half of your ingredients into an uber blender (I use a BlendTec but Vitamix should work), add about 1 cup of water and pulse it a couple of times to create space for the rest of the ingredients.

When you have created space for the rest of the ingredients, load them in and pulverize (my blender has an automatic Whole Juice timed setting).  

If you can't fit _everything_ in (I can usually just eek everything in, sometimes barely), feel free to save it for the next day.  *I usually sacrifice half a cucumber if something needs to go.

From there, enjoy your breakfast! If you are flying solo, it should make enough juice to fill a couple of ball jars to give you some green boosters throughout the day.  Generally since I've gotten back, half of it has been my breakfast and I try to eat mindfully throughout the rest of the day.

**Yes, kiwi skins are edible and under appreciated!  Also as a nice touch, add the kiwis after the juice has been prepared, and blend it just a little more, this makes sure the black seeds are still whole and lend a nice crunch to the smoothie.

~~~~~~~~~~~~~~~~~~~~~~~~~~

Obviously this can be tailored to your personal preferences, but I've found that the lighter water heavy vegetables like romaine and cucumber really help give refreshing body to smoothie without making it too vegetal, overwhelming the qualities of the apple and kiwi.  The banana also really helps round out the body of the drink, as I learned one morning when I forgot to add said fruit and was wondering what the drink was missing... Speaking of missing, I'm all out of romaine... erk! 

Saturday, April 6, 2013

Full Bodied Zucchini Hummus (Low carb! Gluten free! Infused with sass!)


It seems like carbs make me tired, like, really tired if I'm not careful.  I once had an internship at an Special Ed facility, and if it was french fries for lunch before the meetings I was a goner. I'd have to leave the group meeting at least a couple of times and go to the rest room and pump out some jumping jacks just to make sure I wasn't passed out, drooling on my clipboard as I sat on the sidelines.

Needless to say, I took pretty well to the low carb lifestyle one finds in raw food diets (and the generally better levels of energy).  However, there are some heavenly flavors one just can't find in the raw food world, flavors like Tohum roasted tahini.  Mind you, Tohum tahini is a specialty that I don't find my self able to (afford) to use all the time, but if you haven't tried it I do strongly recommend it.  Thankfully, there are other slightly more cost effect brands that are delicious enough.

Anyway, I do digress... Since I got back from Asia, I've been trying to eat better/more healthy, and felt like turning to a diet heavy in fresh fruits and raw vegetables was a good start, while minimizing my intake of processed foods.  So, you can expect to see updates (often green in color), of some of my staples during the past week.

One of the delights I whipped up was thus hummus.  I used some components of the raw base (zucchini in lieu of chickpeas),, and matched it with the flavoring components of my historical favorite hummus (the one on the side of this bag), and tackled the problem of raw hummus traditionally having the consistency of a thick salad dressing (moar flaxseeds!).

The end product was the full bodied, flavorful hummus I fondly remembered, that I could eat freely with carrots and celery without Mr. Sandman dragging me off to Nod.

Speaking of Nod... I'm still a bit jet lagged, and should get this recipe down before I PTFO...

Hummus!

  • 2 Large Green Zucchinis, cut into chunks
  • 2-4 cloves of garlic, peeled*
  • 2 t Vegetable Better than Boullion
  • 2 t Franks Hot Sauce
  • 6 T Fresh Squeezed Lemon Juice
  • 3/4 c Roasted Tahini
  • 1/2 T Cumin Seeds, Toasted
  • 1/4 c Extra Virgin Olive Oil
  • 3 T Nutritional Yeast
  • 1 t black pepper
  • 3 T Flax**
Throw everything but the flax into the high power blender or food processor. Blend until smooth.  If mix is watery, toss in the flax seeds and again blend until smooth. If you are using a food processor instead of a blender, I'd recommend using pre-ground flax meal for optimum smooth temperature. 

Transfer hummus to a container and place in the fridge until the flax seed has set.  When set, enjoy with carrots, celery, or whatever else you like to dip into hummus.  I've been eating it on raw onion bread with fresh sliced of tomato and a few grinds of pepper. 

*Garlickyness is a matter of personal preference, I go for 4 but that can be a bit much for most folks.
**Every zucchini will have different levels of water content, so you may need more or less hummus. You do not want to add too much, or else you will give the hummus a gummy texture, otherwise, it should be great! 

Monday, January 14, 2013

Christmas Quinoa Tabouli


Tabouli, tabbouleh, tabouleh, tabbouli... So many different ways of spelling this dish.  I have so many slight variations on using making this dish work for me, though I think I may've found my new favorite; a spin is given on this old dish with a blend of lightly toasted spices and pomegranate seeds.  I also decided to kick things up a bit by mixing two types of parsley, flat leaf which adds body and curly which really "grips" the dressing and quinoa. 

As a note, when making tabouli, recipes should be taken more as rough guidelines and always finish more on personal preference or what you have in your cupboard.  If you like your salad extra tangy, use more lemon juice. Have a couple sprigs of parsley left? Toss them in! Prefer Have cilantro over mint? That's your call.

While I use quinoa, classical recipes call for bulgur. I prefer to use more leftover, gluten free whole food oriented alternatives, such as quinoa, brown rice, hemp seeds, coarsely chopped chickpeas, etc.  

Christmas Quinoa Tabouli
(serves six as a side) 
  • 1 cup cooked quinoa, lightly fluffed
  • 8-12 cherry tomatoes, about 11 oz
  • 1 shallot, finely chopped
  • 3 T fresh lemon juice
  • 1 large head flat leaf parsley (3-5 oz), 
  • 1 large head curly leaf parsley (3-5 oz) 
  • 1 bunch of mint (1 oz), stemmed
  • 2 t ground allspice
  • 1 T ras el hanout
  • 1/3 c extra virgin olive oil
  • seeds of 1 pomegranate 
  • Salt & pepper to taste
Using a small, sharp knife, cut the tomatoes into quarters and eights, toss them into a large mixing bowl along with the shallot and lemon juice. 

Grab the parsley by the head and twist off the coarser stems and set aside for another use (such as juicing, blending, making stock, etc. If the stems are tender and not too woody, I often include them in my parsley salads).  For the flat leaf parsley, pack the leaves up tightly, "balling" them a bit, and using a large sharp chef's knife cut them into thin slivers no more than 1/2 an inch thick.  Add to the large bowl. For the curly leaf parsley, coarsely chop so that you get lots of little 'florets' of the tips.  Add to bowl.

For the mint, stack the leaves together, and using a very sharp knife cut the leaves into ribbons width-wise. Be gentle with them, as mint leaves tend to discolor when bruised.  Add to the bowl.

Add the ras el hanout, allspice, olive oil, pomegranate, and some salt and fresh ground pepper and toss.  Feel free to add some more salt/pepper/lemon juice to taste, and serve. 


Monday, December 21, 2009

Calamari, sorta kinda not really...


So I recently got my hands on Living Raw Food, the second book of recipes from the Pure Food and Wine proprietor. It did pretty much the same thing the last book did, which was reignite my interest in working with raw foods.

The appeal of raw foods wasn't so much about health (O.K. wasn't only about health) but a cross between the sort of primitive molecular gastronomy practiced by many raw foodists and the meaningful exploration of high quality ingredients. I was also taken in by the use of whole foods, given processed foods lost much of their appeal to me during that brief Atkins-diet phase I had when I was 20 or so. While I ditched the diet of waterbath cheesecake made with splenda, I never quite picked pasta and other refined starches back up.

It is recipes like the above, calamari with tartar sauce, that are reigniting my passion for exploring this cuisine. However it is also reminding me of the frustrations when dealing with the not-so-vegan-inclined..

Tess (my vegan buildingmate): "Ike, you want to come upstairs with us to get some raw vegan calamari?"
Ike (Tess's not so vegan but very blue partner): "I don't like calamari."
Tess: "Well it isn't calamari."
Ike: "I don't really like things fried."
Tess: "It is raw! How can it be fried?"
Ike: "Well, you said it was calamari."
Tess: "It is raw vegan, how can it be squid or fried?"

Ai. Ike did come upstairs. Ike ate raw vegan calamari. Raw vegan calamari was deemed good, or at least acceptable for those who don't like fried calamari.

Honestly it isn't all that much like calamari, though if you like calamari you'll probably like these. It is definitely a snackable concoction that makes for a good traveling companion, it is cute, and novel, all told pretty easy to make. Cutting them into rings is a vanity that you can surpass if you feel like it. Regardless of the differences, the inspirations you find raw foodists make from the original food is a delight.

While I'm not going to post the recipe here (see the book below, it is worth it), I'll mention that a mix of spices, ground up golden flax seeds, some lemon, and king oyster mushrooms are friends of yours... And of course, do not forget the salt.

Wednesday, October 28, 2009

Delicata Squash Cheesecake


It has been a busy couple of weeks! I have made quite a few dishes, many of which will be lost due to a lack of archiving. Thankfully I am sure every thing has left me with some imprint, and I am now at least slightly wiser... My cakes will be fluffier, cookies crispier (on the outside, with chewy tender insides), and ice creams creamier.

Chai frozen yogurt, whisky apple pie, carrot sorbet, broiled radicchio slaws, five spice spreads, dark-chocolate stout ice cream, celeriac-green apple soup are some of the casualties of this fall that may never get posted. My Community-Supported Agriculture share has tossed me some curveballs, and I have handled them with grace, rendering me a bit too busy to give my blog some well-earned love. Appropriately enough, it is with some sadness that I am not off picking up my CSA share right now, which ended last week. The winter share, with rutabagas, radishes, and leafy greens will be returning on Friday, then every other week through December.

There are always a few items I have a hard time repurposing, depending on what is going on in my life at that point. This fall it was the adorable little carnivale and delicata squashes showing up in my share. They are lovely, sweet little squashes with edible skins that deserve a good place on a plate... Not the sort of thing to be brought out for pot-lucks, which has been my usual modus-operandi when it comes to food preparation. Eventually, I ended up with several and remembered that there was a Kabocha Squash recipe I had been considering making. And below we have it!

-This is definitely a recipe in progress, changes I'm planning for next time will be marked with an asterix and my intent for the future round-

Delicata Squash Cheesecake

Walnut-Lime Crust:
  • 1/4 c (2.2 ounces) Palm Oil shortening
  • 1/2 c (2 ounces) walnuts, toasted
  • 1/2 c (2 1/2 ounces) packed light brown sugar
  • 1 1/2 c (6.2 ounces) graham cracker crumbs
  • 2 t grated lime zest (about 2 medium-small limes)
  • 1/2 t cinnamon
  • 1/4 t ground ginger
  • 1/2 t salt

Kabocha Squash Filling
  • 3 lbs of sweet fall sqaush (I used Delicata & Carnivale, Kabocha and Butternut will also work)
  • 8 oz firm silken tofu
  • 1 c (7 ounces) white sugar
  • 1 1/2 t cinnamon
  • 1/2 t freshly grated nutmeg
  • 1/2 t salt
  • 1/2 t umeboshi paste*
  • Juice of 1 medium lime*
  • 1 T soy yogurt*
  • 1/2 c arrowroot starch*
  • 1 1/2 T brandy*


1. Steam the squash, until the a knife easily pierces the flesh and the stem falls off. To do this I prepared a large pot with an inch or two of water on the bottom, and placed a steamer basket within. I put the sqauash atop the basket, and brought the water to a boil over high heat. I reduced the heat to medium, covered the pot and let the squash cook for about an hour. When it is done, remove it from the heat and let it cool. Meanwhile, I....

2. Preheated the oven to 300 to prepare the crust: Grease a 9 inch springform pan. In a food processor chop the walnuts with half of the brown sugar in a food processor, until they are coarsely ground but not turning into a flour. Transfer walnut/sugar mix to a mixing bowl with the rest of the ingredients, except for the shortening. After the dry ingredients are mixed, add the shortening and stir with a rubber spatula until everything is evenly mixed. If the mix is too dry to stick together when pressed against the edge of the bowl, add a couple of tablespoons of water as needed. When done, press into the bottom of the pan and up the sides if you have extra.

3. Put the crust in the oven and bake until it is golden brown, about 12 minutes. Remove and let cool completely. Leave the oven on.

4. When the squash is cool enough to handle, cut it in half, scoop out the seeds and scoop the flesh away from the skin. It is ok if a little skin gets in in the case of delicata and carnivales. Get 2 1/2 cups of flesh (save the rest for something else), and place the flesh into a blender bowl. Add the rest of the ingredients for the filling, and blend until well mixed and smooth (hi-power blenders are great for this!).

5. Pour the custard mixture into the springform pan and place in oven. Bake until the middle is set, with the center still slightly jiggly, about 1 hour. Cool completely, unmould, and serve!

*Next time I would use less arrowroot starch (probably 1/4 c + a T or two), less lime juice just for tartness. The yogurt and umeboshi paste are optional, I just happened to have them, though you may want to add more salt if you ditch the ume paste. and I forgot the brandy but would try to remember it next time.

The cheesecake is somewhere between a pumpkin-style pie, and a cheesecake. It is virtually fat free, tangy, and certainly interestingly flavored, if not flat-out good. It is good enough for me to seriously desire to make again.

Friday, October 2, 2009

Stewed Tomatillos & Tomatoes


You say Tomato, I say Tomatoes & Tomatillos... OK that didn't work out the way I wanted it to, but needless to say.... One of my most recent bounties has been tomatillos and tomatoes... From this I have made sauces, and even the adventurous (and delicious) tomato jelly (recipe forthcoming, probably). This dish is surprisingly not much less adventurous than the tomato jelly, with interesting sour overtones similar to those I have found in some Malaysian dishes. This likely had something to do with a tart leek stock I used, as much as the contents of the soup... If it is something you desire, I feel like some lime juice could help achieve it.

Anyway... Having recently begin a new job with a vegetarian good food fast startup, I am a bit on the exhausted side for florid posts, so I am just going to git on with the recipe... It goes well straight on its own, or with a cous cous or other grain. It can be had hot or cold.

Stewed Tomatillos & Tomatoes

2 T extra-virgin olive oil
1 large white onion, chopped
2 poblano chilis, chopped
2 cloves garlic, crushed
1 1/2 pounds tomatillos, husked and washed
1 1/2 pounds tomatoes*
1 cup home made stock or water
Salt & Pepper to taste
2 T Vodka (optional)**
2 T lime juice or white vinegar (also optional, if you like tart)

*I used mixed cherry & pear tomatoes. Large tomatoes, of any ripeness, cut into chunks will also work.
**Vodka, along with white wine, is a lovely flavour enhancer of tomato products.

Warm the oil in a large pot on a medium-high heat, when the oil heats up add the onion, pepper, and garlic until the onion is has begin to brown, about five to ten minutes.
Add the tomatillos, cook until the skins start to break open, ten to fifteen minutes. Pour in the stock and vodka, and stir, bring to a boil, then reduce the heat to produce a slow bubble and cover, cook until the tomatillos are mostly dissolved, about thirty minutes. Add some salt and pepper for flavor.
Returm the heat to medium-high. When the mixture starts to bubble, add the tomatoes. Cook, stirring occasionally, until the tomatoes wilt but their skins remain intact. Now add the sour liquids if that is what you like.
Add more salt and pepper if desired, serve hot, at room temperature, or cold, drizzled with olive oil if desired.

Sunday, August 9, 2009

Slightly Savory Watermelon Salad


Seasons aren't the most fair entity here in the North East. For about six months a year the earth provides us with nothing, and then in June the fresh produce begins to trickle in: parsley, asparagus, lettuce, strawberries, garlic scapes... By August, the trickle becomes a torrential rainbow-like flood. We don't "just" have watermelon, there are yellow and red melons, beets in gold, and red, and stripes, tomatoes in purple, green, zebra, and so on. There are so many wonders and joys to thoroughly explore with all of your senses!

Unfortunately there is a little bit of a bottle neck in what the human body can consume in a given period of time, no less a limit on the time one has to cherish and worship this bounty in a manner it deserves. The best I can do is incorporate the wealth of my CSA.

Today's recipe is a veganized version of a pairing familiar to foodie dorks, mozzarella and watermelon. Yet, for some reason it has never quite become that popular; likely because watermelon seems to be regarded as a summer-season only produce that we wont hack nature to distribute in winter. This salad doesn't contrast the sweetness of the watermelon, rather compliments it with some slightly sweet slightly sour slightly savory flavors... The saltiness of the ume plum vinegar gives it a nice complexity, the black peppers and basil give it a little substance, and the tofu provides a fantastic textural contrast to the fleshy, juicy bursts of watermelon.

Before I go into the actual recipe, I want to give a little public service announcement on the watermelon rind. If you have the divine grace of getting your hands on an organic watermelon do NOT discard the rind. While the toughness of the green outer skin varies (the above is fairly tender and chewable, I have found solid dark green watermelons to be a little thicker in the rind), the flesh is similar to that of a cucumber. While I am sure there is no shortage of things to do with watermelon rinds, I eat them along with the sweet flesh. Pickling is something I intend to do one of these years...

Slightly Savory Watermelon Salad


1 small watermelon
1 medium bunch basil
1/2 pint of grape tomatoes
8 oz of silken or soft tofu, drained, dried
1 T umeboshi plum vinegar
Pink Himalayan sea salt
Pepper
Pistachio Oil*

Cut the melon flesh off of the rind, and cut into cubes. Halve the grape tomatoes, Chiffonade the basil. Cube the tofu. Place in a bowl. Sprinkle with vinegar, oil, a few grinds of fresh pepper and a couple of gratings from a salt stone to taste... Toss gently, trying not to break up the tofu.

Serve. I consumed with chop sticks.

Wednesday, July 29, 2009

Seasonal Slaw, Featuring Chiogga Beets, Served on a Bed of Kale


Mmm... Clearly I've got an axe to grind against my self, on that whole "only posting desserts" thing... Being unable to take new pictures also seems to be doing wonders for my blog-updating. Sadly the dishes I've made today, a Ras al Hanout and Passion Fruit slaw as well as the Whole Grain Medley tossed with Tomatoes, Basil, and Mint will be lost. The fudgey brownies from a new recipe I am tooling around with are not particularly photogenic, so cheers to that?

Anyway... The camera battery charger remains unfound (!!! pain), so I will continue posting _real_ food recipes, while I cry to my self about the veganized peanut butter crispy bars unphotographed, along with the chocolate bourbon pecan pie I am making for tomorrow.

I have yet to find my "always go to" dressing recipe for slaws, but I also never buy anything to make my slaws...

Seasonal Slaw, Featuring Chiogga Beets Served on a Bed of Kale
Serves 6

Dressing
  • 1/4 c fresh lime juice
  • 2 T Olive Oil
  • 1/4 t salt (or soy sauce)
  • 1 T nut butter (optional)
Salad
  • 1 small head cabbage, shredded (red, green, combo, whatever)
  • Any combination of the following, shredded, matchsticked, thinly sliced, or finely chopped:
  • Sweet Onions or Scallions
  • Kale
  • Beets
  • Cilantro
  • Parsley
  • Carrots
  • Cucumbers
  • Squash
  • And more!

Prepare the dressing items in a bowl, mix well.
Prepare and toss together the remaining ingredients in another bowl, drizzle dressing over. Salt to taste.
It is good let it sit a few hours, or covered in the fridge over night

    Friday, July 24, 2009

    Simple Heirloom Tomato Salad


    Heirloom tomatoes are not just candy for the mouth, but candy for the eyes as well. Above is a Marvel Stripe tomato. These varieties are best used raw, in large slices. They are pretty yellow things with red bleeding upwards. Cooking them will break down their lovely visual presence. The flavor is not strong, but like all heirlooms it is there and can be coached out to your taste buds with a little bit of salt and olive oil. This is an easy, scalable recipe that works well for individuals with gardens.. Because, really, who grows tomatoes without also growing basil?

    So... a simple little first-course, salad, lunch, snack, candy-for-your-camera, whatever you want it to be...

    Simple Heirloom Tomato Salad
    Serves 2

    • 1 very large heirloom tomato, or 2 medium heirloom tomatoes
    • A couple of sprigs of fresh basil
    • Good sea salt*
    • Black Pepper
    • Extra virgin olive oil

    Step 1: Slice the tomatoes about 1/3 an inch thick, then layer with fresh basil leaves on a plate.
    Step 2: Drizzle with oil, sprinkle with a pinch of salt, give a fresh grind of pepper. Serve.


    *I used Chardonnay Smoked Fleur De Sel, as currently I am a fan of all things slightly smokey.

    Wednesday, July 22, 2009

    Signs of Summer: Heirloom Tomato Gazpacho with Seasoned Cucumbers


    I know it may be hard to believe, but I don't _just_ make desserts. I do make plenty of other food, too! Dessert just happens to be more photogenic and easy to distribute among your friends. I am making plenty of dishes today for a girly dinner party I am organizing, but sadly my camera's battery is dead and I can't seem to find the charger...

    So, I dropped by Red Fire Farm, who do my CSA, to take advantage of their pick their own options for CSA subscribers. I was absolutely crushed to find out that I got there too late, and they had ploughed over the strawberry bushes for the season. However I did come back with loads of green beans, fresh herbs, and some Iron Bound Island seaweed. Still, the strawberries were a tragedy... I picked them last year, in early July... They were so ripe that I had to use them in less than 24 hours, but the taste was unbelievable... The crown of the crop was a red wine strawberry sorbet, rhubarb had passed season so no pies.

    So... Here is a moment to remember the strawberries that I will not have this season...

    ...

    And a brilliant red recipe to celebrate the bounty the farm offered, and remember what has passed, and will come again. The tomatoes were hothouse, sadly.. But that just means this recipe is going to be even better in August.

    Heirloom Tomato Gazpacho with Seasoned Cucumbers
    Serves 6
    Gazpacho
    • 3 1/2 pounds heirloom tomatoes, cut up into large chunks*
    • 2 t sea salt**
    • 1 T extra virgin olive oil
    • 1 clove garlic, chopped
    • A few twists of black pepper
    • Juice of 1/2 a lime
    • 1 quarter of a red beet (optional, gives a lovely depth of color)
    Seasoned Cucumbers
    • 1 large cucumber, diced***
    • 1/2 c diced sweet onion
    • 1 garlic clove, minced
    • 2 T fresh minced basil or basil flowers
    • Juice of 1/2 a lime
    • 1/4 t sea salt
    • 1/2 t paprika
    • 2 T extra virgin olive oil
    • a couple of grinds of pepper
    Step 1: Soup - Toss the tomatoes with the ingredients in a large bowl and let sit for at least 30 minutes.
    Step 2: Cucumbers - Meanwhile, assemble all of the ingredients for the cucumbers and toss together.
    Step 3: Soup - Blend until creamy and smooth. Strain through a cheesecloth into your serving bowls, garnish with the seasoned cucumbers.
    Step 4: Serve. I like to drizzle the bowls with a little extra-virgin olive oil, a pinch of coarse sea salt, and a twist of fresh black pepper.


    Notes
    *Single variety is good, the sweet Brandywine works well, as does the smoky Cherokee Purple.
    ** I used a smoked salt
    *** Depending on the cucumber, you can leave it with its skin and seeds. Thicker, older ones can have rough skin that is tough to chew, and large seeds. Some smaller, young cucumbers have a tender skin and small seeds.

    Monday, June 22, 2009

    Cherry Choco DETH!!1!


    So first I'm gonna say I wanna go to Burning Man this year (Death Guild ho!). Second, I am going to keep this simple, for it is a simple recipe.

    It is really a rich, creamy torte-like mousse that is, aside from having to soak the nuts, extremely quick and easy to make. It is one of the many items that people would not believe was vegan. Even closing my eyes and thinking about it right now I can imagine falling into its softly yielding texture.

    Anyway, on to the recipe!

    Cherry Chocolate Torte

    Crust:
    • 1 Chocolate crust of choice*, pressed into a 9" springform pan

    Filling:
    • 2 C raw cashews, soaked overnight, drained
    • 1 C dark chocolate, chopped (I used some Valhrona Orange Noir and Callabaut bittersweet)
    • 1-2 C cherries, pitted (frozen work)
    • 1/2 C water
    • Pinches of salt, drops of vanilla, flecks of cinnamon, espresso shots.. whatever floats your boat.

    *I used a simple raw crust made up of 3 parts walnuts to 1 part cacao nibs, and a pinch of salt with enough coconut butter to hold it all together. Press into pan, refridgerate.

    So, this is simple. Real simple. A powerful blender helps, and may be necessary. Soak the cashews overnight. Drain. Blend down as far as you can. Add 1/4 c water and make even smoother. Add whatever flavorings you would like. Meanwhile melt the chocolate in a double boiler. When melted, add to cashew mix and blend until very smooth, adding water as needed.

    Once smooth, stir in the cherries by hand. Save a few to adorn the torte. Pour the chocolate mix into the pan and smooth out. You can drag decorative lines into the chocolate substance as well, put in the fridge to set. Should be done fairly quickly.

    You may want to layer the bottom of the springform pan with saran wrap, for ease of removal. I served this at a dinner party cut into single serving two bite pieces. It was loved by all. Babies may have been made. I may need sleep.

    Tuesday, June 2, 2009

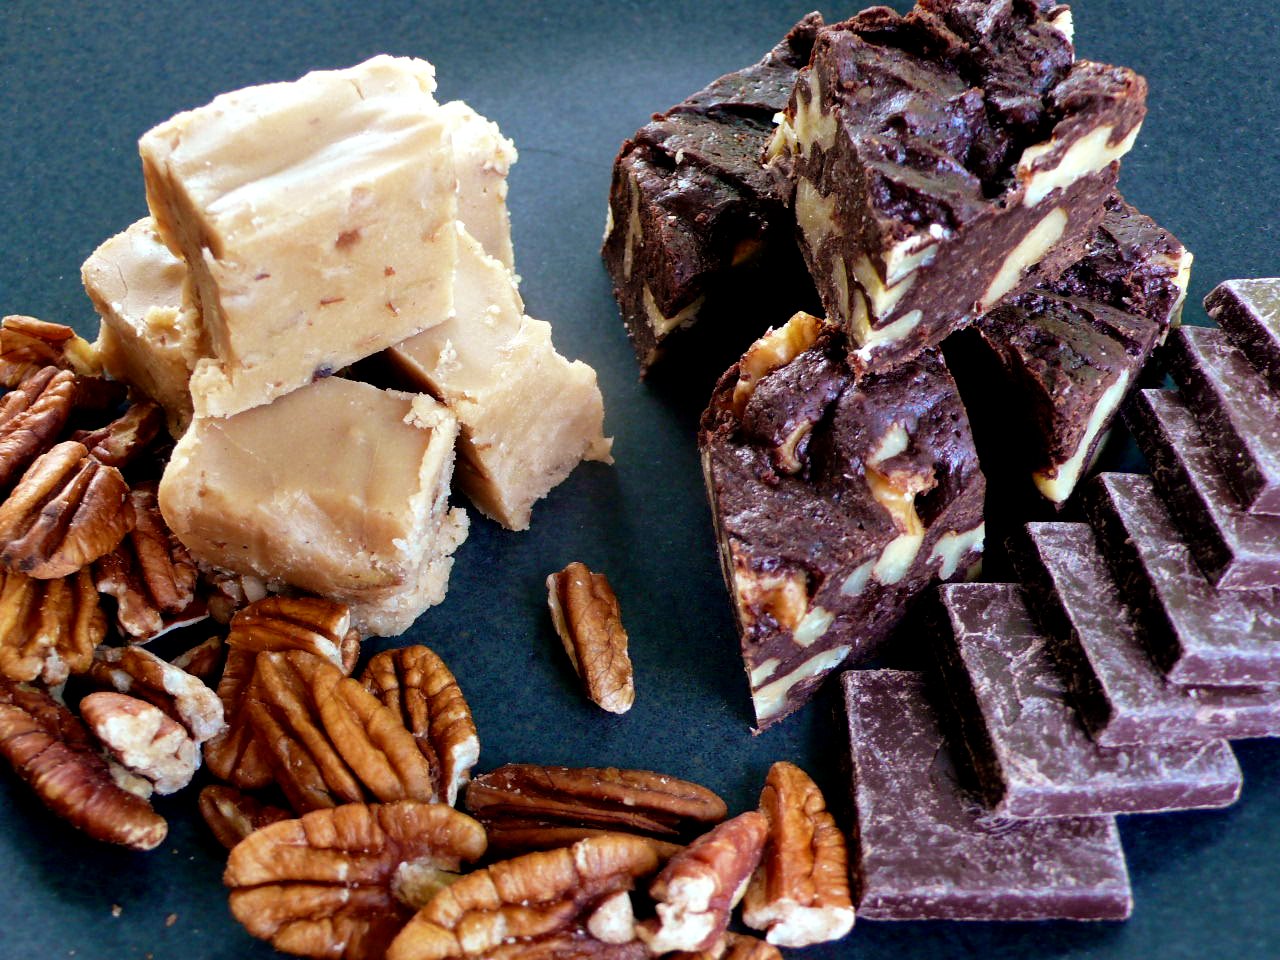
    Dominos - Luxury Brownies and (Coconut) Milk Fudge


    I seem to have a chocolate and vanilla thing going on... It is late, sleep soon, the recipes always need tooling, but this is what I did, and I still ended up with a tasty end product.. Both products are best served chilled, particularly the fudge... I am not sure if I made an error in the confectionary process, or the veganized recipe needs tooling (or both). Ah to the recipes.

    Coconut Milk White Fudge with Nuts

    4 cups sugar
    2 cups coconut milk (I used a 14 oz can plus 2 T water)
    1 stick cinnamon, preferably Mexican canela
    1⁄2 cup light corn syrup
    1⁄4 tsp. baking soda
    1⁄4 tsp. fine salt
    8 tbsp. unsalted butter
    2 tsp. vanilla extract
    1⁄2 cup chopped toasted pecans
    1⁄2 cup chopped toasted walnuts
    1⁄2 cup chopped toasted pine nuts

    1. In an 8-qt. pot, whisk together sugar, milk, cinnamon, corn syrup, baking soda, and salt. Bring to a simmer over medium-high heat; do not stir the milk. Use a metal spoon to skim off and discard any foam or solids that rise to the surface, rinsing the spoon in water after each use. Simmer, brushing the sides of the pot occasionally with water to prevent the sugar from crystallizing, until the mixture thickens and a candy thermometer reads 240°, about 30–35 minutes.
    2. Remove pot from heat. Add butter and vanilla; do not stir. Remove and discard cinnamon. Let mixture cool to 180°.
    3. Grease an 8" x 8" baking pan; line bottom with greased parchment paper. Stir milk–sugar mixture with wooden spoon until no longer glossy, 5 minutes. Add pecans, walnuts, and pine nuts; stir to combine. Transfer to baking pan; smooth surface with a rubber spatula. Chill until set, about 8 hours. Turn fudge out onto a cutting board and cut into sixty-four 1" squares.

    The brownies... I have been seeking a good, dense, fudgey low flour vegan brownie recipe... the kind you get for flourless chocolate brownies. Sadly I have yet to find something that can lend the structural integrity necessary needed for flourless chocolate brownies, and the rest turn out cakey... My efforts at flourless brownies with vegan egg replacers thus far have been fairly tasty but utter failures as far as brownies are concerned. Then I saw this recipe from Coco&Me which looked promising... a low flour brownie, and my veganized effort showed it had enough flour to lend structure but not enough to dillute the quality chocolate used... The butter was replaced with a blend of water, oil, and lecitin, the eggs were replaced with Bob's Red Mill egg replacer. The final recipe could still use some work, but getting closer and leagues better than the flourless varities.

    oh man, I need to sleep... More recipes and concepts coming soon.

    Monday, May 4, 2009

    Red is Stop. Green is Go. Pink is Yum.


    Waugh firefox crash just sucked my post into a void :(
    Needless to say, I have a serious problem.
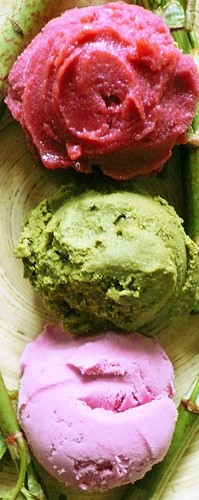
    Pictured above is a sorbet, an ice cream, and a frozen yogurt. Not pictured is another four or five ice creams, another sorbet, and well.. probably some other stuff, too. My fridge is full of ice creams... FULL! Well, onto the recipes...

    Red Wine Strawberry Sorbet with Black Pepper
    • 2 pounds strawberries, hulled and washed
    • 1/4 c fresh lemon juice
    • 1 c dry red wine
    • 2 c sugar
    • 1 T vanilla paste
    • 1/2 fresh ground black pepper
    • 1 t balsamic
    • 1/2 t citric acid (if strawberries are out of season, or to taste)
    Toss strawberries with lemon juice, balsamic, vanilla, and citric acid, set aside. Meanwhile put wine, sugar, and black pepper on the stove. Warm over medium heat until sugar is dissolved. Pour syrup over strawberries, stir, let cool to room temperature then refrigerate until chilled.
    Puree or blend strawberries until smooth, then prepare according to ice cream manufacturer's instructions.


    Thai Basil Coconut Ice Cream
    **Under Construction!**: Re: I didn't log it, and it needs work anyway... I want to say I based it off of this recipe from Kitchen Therapy but looking at the recipe to say I based them off one another is a very very loose interpretation...

    Strawberry Frozen Yogurt
    • 1 pound plus 2 oz fresh strawberries, hulled and washed
    • 2/3 c sugar
    • 2 C strained plain vegan soy yogurt
    • 1 T agave
    • 1 t lemon zest
    • 2 T red wine
    • 1 t balsamic vinegar
    • 1 t vanilla extract
    • 1/2 t citric acid
    • pinch salt
    • dash lecithin
    OK I should say straight up, pretty much every ingredient after the yogurt is semi-optional, if you don't have it, don't stress it. Don't have open red wine? Use kirsh, or vodka, or rum, or nothing, or whatever. And so on... HAVE FUN! Anyway, that said, dice the strawberries, toss them with the sugar and liquor. Let sit for 2 hours.
    When two hours have passed, blend with the rest of the ingredients, chill in refrigerator. When chilled, prepare according to manufacturer's directions.

    I am going to say that the posted recipes are 'sketches.' These are rough guidelines I followed in the kitchen. I often find recipes restrictive and when it comes to flavouring, I explore with abandon. Not having some things listed rarely stops me from making something. In the case of the strawberry sorbet, rather than opening a bottle of red wine I used 1 C of a red wine black pepper sorbet I had left over, which was very dry without much sugar. In that red wine sorbet I used some leftover concord grape sorbet. I am constantly using things as much to get rid of them as I am to explore and experiment. I do advise you to do the same, though admit my boldness may be bolstered by my compression-based ice cream maker that does not need recuperation time to make a second batch...

    Remember, failure is just an excuse to cook even more, and if you are sticking to the sort of ingredients life happened to hand to you it isn't like you invested any money in the recipe... Speaking of things being handed to you, next up is going to be the Brown Sugar Ice Cream with Dark Chocolate Covered Graham Crackers...

    Monday, April 20, 2009

    Lazy Blogday - Twofers Unrelated - Sunbutter Cookies n' Cream, and Chocolate Mousse Pie


    These desserts really do not have a whole lot in common, and both stand up well enough on their own to not have to be sharing a plate... The pie in particular, at least if you get a bite with the crust. I have never had a pie in which the content was so meaningfully enhanced by the crust; in this case a mocha-walnut concoction. The airy filling is grounded in harmony the earthy base.

    The sunbutter ice cream, I am not so kind toward. It is delicious and addictive, but also hard and flaky if not allowed to warm up a little, first. I will probably be making it again, and try some new spins on it... Texture aside, at the end of the day its life in my freezer will not be long. Still, if I want something more solid I will be going to my other peanut butter ice cream recipe.

    My photographic laziness aside, there is a reason these two gems (one may be a little rougher, but) share a plate. They both offer special considerations toward the sensitive and the allergy-prone. The pie contains no gluten (or dairy ;) ), and the ice cream was made with a peanut-butter allergic friend in mine. So for those times when you don't want to make someone feel like everyone else is eating less well because of their needs, these dishes could please any palette.


    Sins for Saints Chocolate Mousse Pie

    So this came about because I wanted to make something for the massage workshop I was partaking in over the weekend. I was not feeling amazingly inspired the night before the event, though. So I just figured "meh," and went to bed later than I should have. I woke up, still wanting to make something, and fingered through a cookbook for an idea and saw a mousse. When I first experimented with vegan cooking, a tofu-based strawberry-kiwi chocolate pudding was one of my first recipes... so I ran some math in my head and this is what I got.

    It was 7:50 AM. My workshop was at 9. Travel time was half an hour. Time was of the essence, so oven baking was out of the question. I wanted to do an oreo cookie crust, but with only 6 cookies that wasn't happening. So instead the crust was inspired by my experience with raw desserts. It was a total win, even better one of the girls of the group is gluten-intolerant, which I had forgotten. And the mousse.. well.. its just good... The food-making part was done within 25 minutes, and while I could have left the kitchen cleaner, I certainly could have left it worse. I was amazingly happy with it (so was everyone else). Though I am going to say it is absolutely necessary to make sure to get a bit of crust with each bite of mousse. Knowing that, So, onto the tart.

    Crust:
    1 and 3/4 c walnuts*
    1/4 c cocoa powder**
    1/2 t sea salt
    2 T maple syrup
    1-2 T raw coconut butter
    1 t ground coffee

    Mousse
    15 oz dark chocolate, chopped***
    1 c plus 2 T soy milk
    1 T cocoa powder**
    3/4 t kuzu starch
    20 oz silken tofu
    1/4 c maple syrup
    2 t vanilla paste (or extract)
    1/2 t almond extract

    1. To make the crust, place walnuts in a food processor and chop until they are fine crumbs. Add everything else except the coconut oil and mix well. Add enough coconut oil for the crust to stick together. Press into 10" spring form pan and place in fridge to set.

    2. To prepare the mousse filling dissolve the kuzu in the 2 T of soymilk. While it dissolves, place the chocolate, cocoa powder, and 1 C of soy milk in a double boiler. Add the dissolved kuzu starch and heat over simmering water, in the double boiler, until melted, stirring occasionally. It should take about 15-20 minutes.

    3. Meanwhile, place the tofu in a blender bowl or food processor and blend until smooth. Add maple syrup, vanilla, and almond extract and blend again. Either blend with chocolate mixture, or fold in.

    4. Pour the chocolate mixture into the springform pan, and chill until set (about 2 hours), or overnight, before serving.

    *I used soaked and dehydrated but that is up to you
    **Valhrona
    ***I used a blend of Trader Joes Dark Pound Plus and Callebeut Semisweet

    NEXT!

    Sunbutter Ice Cream

    9 oz silken tofu
    1 c water
    1 c soy milk
    1 c sunbutter
    1/4 c sugar
    1/2 t salt
    1 t vanilla
    1 T powdered maca (Optional. I like the malty flavor it imparts)
    15-20 (or more!) Chocolate Sandwich cookies (I used Joe-O's), broken up just a lil'.

    Bring the water to a boil, add sugar and let cook for 5 minutes. Let cool. Blend remaining ingredients (except for the cookies) until smooth. Chill and prepare according to the directions of your ice cream maker. Once mixed, add in the cookies and either stir in by hand or churn until they are just mixed. Pack into container and enjoy now, or later, or now and later.

    Tuesday, March 24, 2009

    Winter Kept Us Warm...


    One of my favourite food items has to be the simplest of simples; brown rice porridge. This dish is a staple in Asian kitchens, where it is known as jook, or congee. It can be jazzed up with tofu, slivers of ginger, vegetable stock, cinnamon, nut butter, coconut milk, vanilla, toasted nuts... the sky is the limit. I have been there, done that, but nothing will ever compare to straight up cooked brown rice, reheated with water until it becomes a creamy porridge.

    This winter I finally swung myself a dedicated morning yoga partner, and every morning after yoga we would sit down to a bowl of brown rice porridge with a cup of genmaicha (roasted brown rice tea). After yoga, if you told me that I could only have this to eat for the rest of my life, and that would be it, I would be happy. Any type of rice works, brown, or white, short grain, long grain, basmati, jasmine, etc. Better than that, you can do this with any leftover grain... millet, buckwheat, quinoa, etc. However, brown rice has my heart. I am not keen on quinoa... it never breaks down into creamy goodness.

    The directions are simple... put as much (or as little) leftover cooked rice or other grain into a heavy bottomed bot, and cover with a half-inch of water. Cook until it is the consistency that you desire. I like my congee to really be pudding-like, others prefer it where the rice has maintained its shape.

    I often add nothing, just a little salt. Today, in the name of using them up, I tossed in some of the tapioaca 'grapes' leftover from the recipe I am in the middle of illuminating... and here is another close up of those funballs, for the heck of it..

    Speaking of simple pleasures... A piece on shared experiences making us happier than material acquisition... And here is where I note that I have never sat down and had this centering dish by my lonesome.

    Tuesday, March 17, 2009

    Malted Peanut Butter Ice Cream


    OK, so maybe the pictures were not as bad as the first one implied... Though this one could use some serious photoshop mopping on my lovely concord grape balls, as well as the plate. Oh well, I'm working on it, I'm working on it.

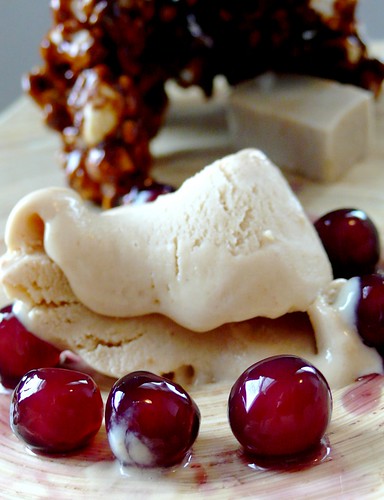
    Appropriately enough, better pictures come with better recipes (Srsly? You mean it gets better than salted concord grape tapioca balls?!) So I am starting to release the more substantial stand-alone items of this concoction. The first, and probably best to make without any grander purpose is the peanut butter ice cream. Sure, the melting ice cream does go beautifully with the crunchy home made cracker jacks, tangy sesame yogurt cubes, and salty-sweet-chewy tapioca balls, but I don't just whip those out of the cupboard.

    Anyway, this was sourced from a number of peanut butter ice cream recipes, and I gave it my own twist... I felt it turned out quite lovely, but it turned out even better when paired with a dark chocolate ice cream, recipe forthcoming... I am going to note I used a super blender for this, so you may want to stick to very smooth peanut butters if using a normal blender. The addition of maca root can be omitted, rendering the peanut butter non-malted. I felt it was missing something, though, which is why I added it. I am sure the type of peanut butter one is using can significantly change this, though.

    Malted Peanut Butter Ice Cream

    1 12 oz package silken tofu, frozen, thawed then drained
    1 cup peanut butter (I used a mix of ground-at-store, Maranatha, and Trader Joe's Valencia)
    3/4 c maple syrup (think I used grade A, Kirkland brand)
    dash cinnamon
    1/4 t Xanthum Gum
    1 T gelatinized maca root powder
    1 3/4 C unflavored hemp milk (or milk alternative of choice)

    Blend ingredients together.
    Chill.
    Churn.
    Chow.

    Tuesday, November 11, 2008

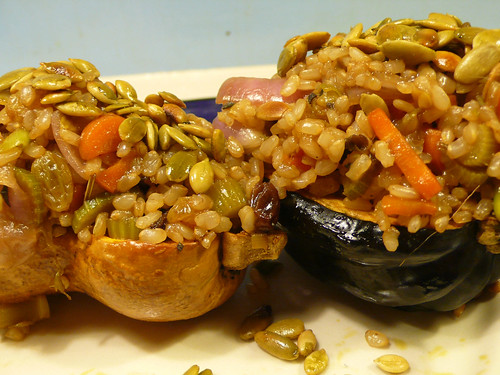
    Lil' Squashes Stuffed with Soy-Maple Rice & Fall Vegetables

    P1030110

    So, fall is officially here. My housemate and I went in on a CSA together, except that he is never really around... so I have been left with a box of CSA veggies all to my self each week. Ya, horrible, rite? rite?! Srsly, thou. I mean, seriously. I do have an excess of vegetables, and a need to use them. However I have also swore that I was going to go through my pantry and not buy anything new, like, anything. So how do I continue to improve my recipe mental rolodex and not spend any money? Ah, the concept recipe. To clarify, concept recipes are ideas that are not detail oriented. They are not baking, or steeped in French cooking science. They are ideas, like "winter vegetable soup," "X vegetable stirfry," "garden salad," etc. They are fantastic for the changing seasons, as you can often adapt the recipes to fit what is seasonally appropriate.

    So, today's concept? Stuffed squash. The no-pantry thing is working out quite well, as I have been trying to following more of a whole foods/macrobiotic lifestyle. So this basically means I need to keep baking and desserts on the down-low. So far it has been going tastily. Not amazingly photogenic (or I was not in the mood to make it such), but wholesome good things. As this is a concept recipe I am going to emphasize that you feel free to substitute things. Don't have celery? Use parsley. Only have two carrots? That is fine. Use quinoa instead of brown rice, etc. etc. Really, this works even if you have leftover grains or some stirfry sitting in your fridge, ignored. However, this is how I threw it down...


    Lil' Squashes Stuffed with Soy-Maple Rice & Fall Vegetables

    4 small squash (I used butternut and acorn), halved lengthwise and seeded
    Canola oil for greasing the pans
    Salt n' Pepper
    2 cups uncooked short-grain brown rice, rinsed (ideally, soak over night)
    3 cups water
    1 large red onion, diced
    1 celary heart, chopped
    2 (very) small leeks, chopped
    3 carrots, cut into half-moons
    2 T fresh oregano, chopped
    2 T maple syrup
    1/4 C wheat-free soy sauce (or more to flavor)
    1 C raisins

    1 cup toasted nuts of choice (I used pepitas, toasted in sesame oil and salt)

    Heat oven to 400 degrees. Place squash cut-side up, brush or spray tops with oil. If you can't prop the squash up, cut a thin slice off the curved bottoms so they do not tip over. Sprinkle with salt and pepper. Roast for 45 minutes or until tender. Keep them warm.

    While the squashes are roasting, combine the water, rice, and a teaspoon of salt. Cover. Bring to a boil, decrease heat to medium low, and simmer until the rice is tender. If there is any water left, drain it out.

    While the rice is cooking, sautee the vegetables in a large, heavy skillet, or two. If you want to be particular, you can sautee the vegetables up seperately. I cooked my carrots seperate from my onions and celery. This step is not necessary, but nice to do if you have the time (which I did). More importantly, I had two burners free. Sautee until tender. If you cooked the vegetables seperately, combine them now, stir in the soy sauce, maple syrup, raisins, and basil, then add the rice. Stir, salt and pepper to taste.

    Divide the rice mixture evenly between the squashes, sprinkle with the nuts, and serve.

    *to toast the pepitas: heat a heavy bottomed pan to medium-high heat, douse with oil, toss seeds in, sprinkle with salt, and shake around until they start to turn brown.

    Other item of note, I am reading "In Defense of Food," and just found out that according to Paul Rozen, a psychologist@UPenn, a third of Americans believe that a diet absolutely free of fat would be better for us than a diet containing even just "a pinch" of fat.

    Monday, November 10, 2008

    The Cherry, the Chocolate, and the Holy Walnut

    So, I told someone that I would make them a chocolatey cherry-y thing when a big thing finally went through. It was still pending, but I had some extra sour cherry juice in my fridge that had been sitting there for months that needed using up, and an ache to make ice cream.

    This wont be a particularly easy ice cream to replicate, as it was a "use up what I have" sort of ordeal. It did stay very soft in texture even after being frozen, so perhaps it could use less sugar. Next time I would use 5 oz unsweetened chocolate, rather than mixing it. That aside, I would leave everything the same until I made it again. Hopefully with pictures. My roommates descended upon it before I could photograph it!

    Onto the recipe...

    Black Forest Ice Cream

    3 ounces unsweetened chocolate (I used Trader Joe's)
    2 ounces bittersweet chocolate (again, TJ's)
    2 T powdered chocolate (I used generic, ideally I'd use the surprisingly affordable Valrhona)
    1 cup sugar
    1 cup water
    1 can coconut milk
    dash soy lecithin
    2 T beet juice (optional)
    1 1/2 C sour cherry juice (this is the stuff in a jar of sour cherries)
    1/4 salt
    1 t vanilla
    1/4 t almond extract
    1 T tapioca starch

    Optional: Walnuts and cacao nibs

    Mix together the water, chocolates, the sugar and the tapioca. Heat until chocolate and sugar have melted, and the mixture has thickened a bit from the tapioca. Mix in the rest of the ingredients and stir until smooth, ideally do this in a blender.

    Cool, and then prepare in ice cream maker according to manufacturer's directions. Add in cacao nibs or walnuts toward the end, if desired.